How can we help you today?
Together, we're reimagining healthcare


A whole health system designed for you


Our home is a short distance from yours
We’re on a mission to make it simple for people to get the healthcare they need. Say hello to care that works for you. Virtual, over the phone or right down the road, get connected to care on your time.
Care made for you
From a routine check-up to a personalized treatment plan, we're all about patient-first care that's easy, convenient and uniquely you.
Heart care
Cancer care
Primary care
Orthopedic care
Hospice + palliative care
Urgent care
OBGYN care
All areas of care
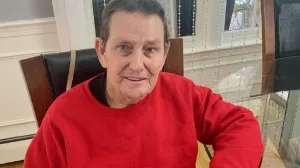
Real stories of real change


It's about time for a different take on medicine
Welcome to a new kind of care experience. Because sometimes, a little different is just what the doctor ordered. At Tufts Medicine, we're making it simpler for people to get the healthcare they need — and closer to home.

We'll always be here for you. Thanks for being there for us.
Your gift to Tufts Medicine changes care experiences for the better, today and tomorrow.
What's new?
Press Releases
Tufts Medicine, Navvis Partner To Accelerate Value-Based Care, Driving Healthcare Transformation in Massachusetts
April 24, 2024
Together, the companies are creating better experiences for patients and physicians, improving affordability, quality, access and experience.
Press Releases
Tufts Medical Center Researcher Studying Pulmonary Hypertension in Kidney Patients Awarded Clinical Scientist in Nephrology Fellowship by American Kidney Fund
April 11, 2024
Dr. Marcelle Tuttle, a first-year fellow in the Tufts Medical Center Division of Nephrology, will be working on research that focuses on the development of pulmonary hypertension in patients with chronic kidney disease (CKD).
Press Releases
Tufts Medicine + Acadia Healthcare Break Ground on New Behavioral Health Hospital To Serve the Greater Boston Area
March 27, 2024
Tufts Medicine, a leading Massachusetts integrated, academic health system and Acadia Healthcare Company, the largest standalone provider of behavioral health services in the U.S., today held a ceremony to celebrate the start of construction on its previously announced state-of-the-art, 144-bed behavioral health hospital in Malden, Massachusetts.

The care you need at your fingertips
Just like our care, the Tufts Medicine app is all about meeting you where you are. Manage all your healthcare needs in one place.